(Tips added at the end of the article below on 10/26/2019)
If you’re like me, you like to save some money. One place that I like to save is by constructing my own antennas. When I was looking to set up my base station at home, I looked through all kinds of designs, and ended on this one, the Dual Band J-Pole.
Inspiration actually came in the form of an email advertisement from http://www.americanradiosupply for a SO239 to 3/8″x24T Threaded Stud Connector for cheap. I was wanting to get a few of these for other projects, so when I visited the site, there it was… plans for the J-Pole.
After some looking around, this design was similar to a product offered by Arrow Antennas (http://www.arrowantennas.com/osj/j-pole.html) that has some great reviews. http://www.eham.net/reviews/detail/1613
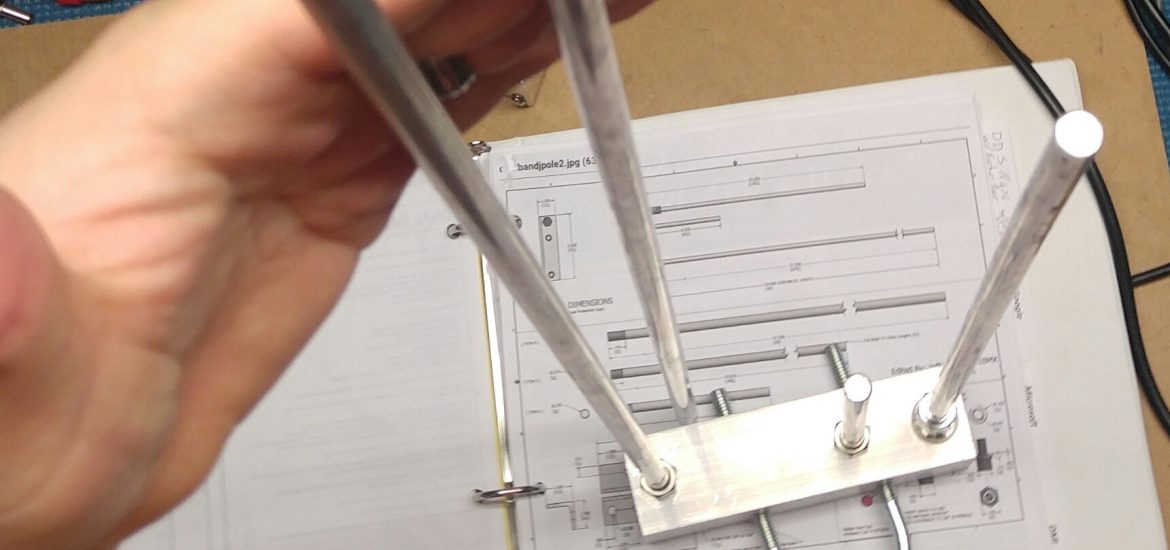
So, I ordered the connector from American Radio Supply, and gathered the other parts, and went to the workbench. The plans are taken right from their website (and included in the below picture gallery). The plans give credit to N1BMX, that seems to now be NT1K.
Skills needed:
- mechanical aptitude
- reading/comprehending instructions
- measuring/cutting metal
- drilling metal
- threading experience for the ends of the aluminum rod (you can really make a mess here if you’ve not done it before)
- metal filing/deburring
Once everything was cut, threaded, assembled and deburred, I mounted it on an electrical conduit pole, and took some SWR measurements.
I tested my antenna on the local N4NRV input frequencies for our two repeaters. With a 50 foot length of RG8, and the antenna 20 feet in the air, SWR was a respectable 1.13:1 for the 147.780 MHz input frequency, and 1.01:1 for the 449.650 MHz input frequency.
I was so pleased with my results that I purchased enough materials to construct another J-Pole for portable use. This second one has a threaded section in the middle of the long element to allow disassembly, and easier transport (see picture album). Later plan is to thread a hole in the base of the antenna to store the loose element for transport. The storage hole wasn’t my idea, I stole it from an image search on google linked from MTC Radio.
For those that don’t want to build, you can get one for $49 plus shipping, $59 for the break-down version. You can bring your price per antenna down if you find 9 friends and go for the 10 pack! http://www.arrowantennas.com/osj/j-pole.html
Overall I give this antenna two thumbs up, and high recommendations for a fun project, and/or a great antenna that is easy to put up, with very little wind load, low SWR, and not too much an eye sore for the neighborhood.
How does the J-Pole work? I don’t know, but the below video is of someone that seems sure of themselves (hi hi).
73!
Tips
Tips from reader KM4QLB –
Thread first, letting the die work its way square. Continue until you have the required .5″ or .75″ of clean, square threads. After that, cut off the messy threads at the beginning (put on a nut first to clean the threads up as you remove it after cutting). Only then, cut the rods to length.
(Learn from a boater) Don’t mix stainless steel and aluminum threads. It’s inviting galvanic corrosion. Buy some aluminum nuts and use those on the aluminum rods. You’re kind of stuck at the SO-239 stud, which isn’t aluminum. So use some silicone grease, or better still, Lanacote, on the threads to make them airtight.